As published in Freshwater Fishing Australia magazine no. 130.
THE CAMDEN BOYS, PAUL BRADBURY AND MARCUS SAUNDERS TAKE US ON THEIR JOURNEY THROUGH BACKYARD BOAT BUILDING AND SEDATE WATERS.
“Fly Fishing is the reason drift boats exist, building them is a good reason for fishermen to exist.”
I wandered around the garden on a sunny December morning, nursing a cup of coffee that, in return, was nursing my weary head. One last beer – it gets me every time! I was daydreaming about an upcoming river trip I was soon to embark on five days on the South Esk River in North East Tasmania with my best mate in a borrowed inflatable boat when memories of the previous night came back to me. F*%k me! Last night, after about the seventh beer, I vaguely remember telling Marcus (said best mate above) that we were going to build our own goddamn drift boat!
The receipt in my email inbox confirmed our plan. Thank you for your order Mr. Bradbury, your copy of Roger Fletchers Drift Boats and River Dories will be dispatched today. Staring blankly at the fence, my mind finally registered the proposition. We were going to build a boat and go fishing in it – all in three months!
So there we were. Two guys with a shed- load of wood (more about that later), a box full of tools and no idea what to do! Not really what you would deem a textbook start, but a start nonetheless.
THE DESIGN
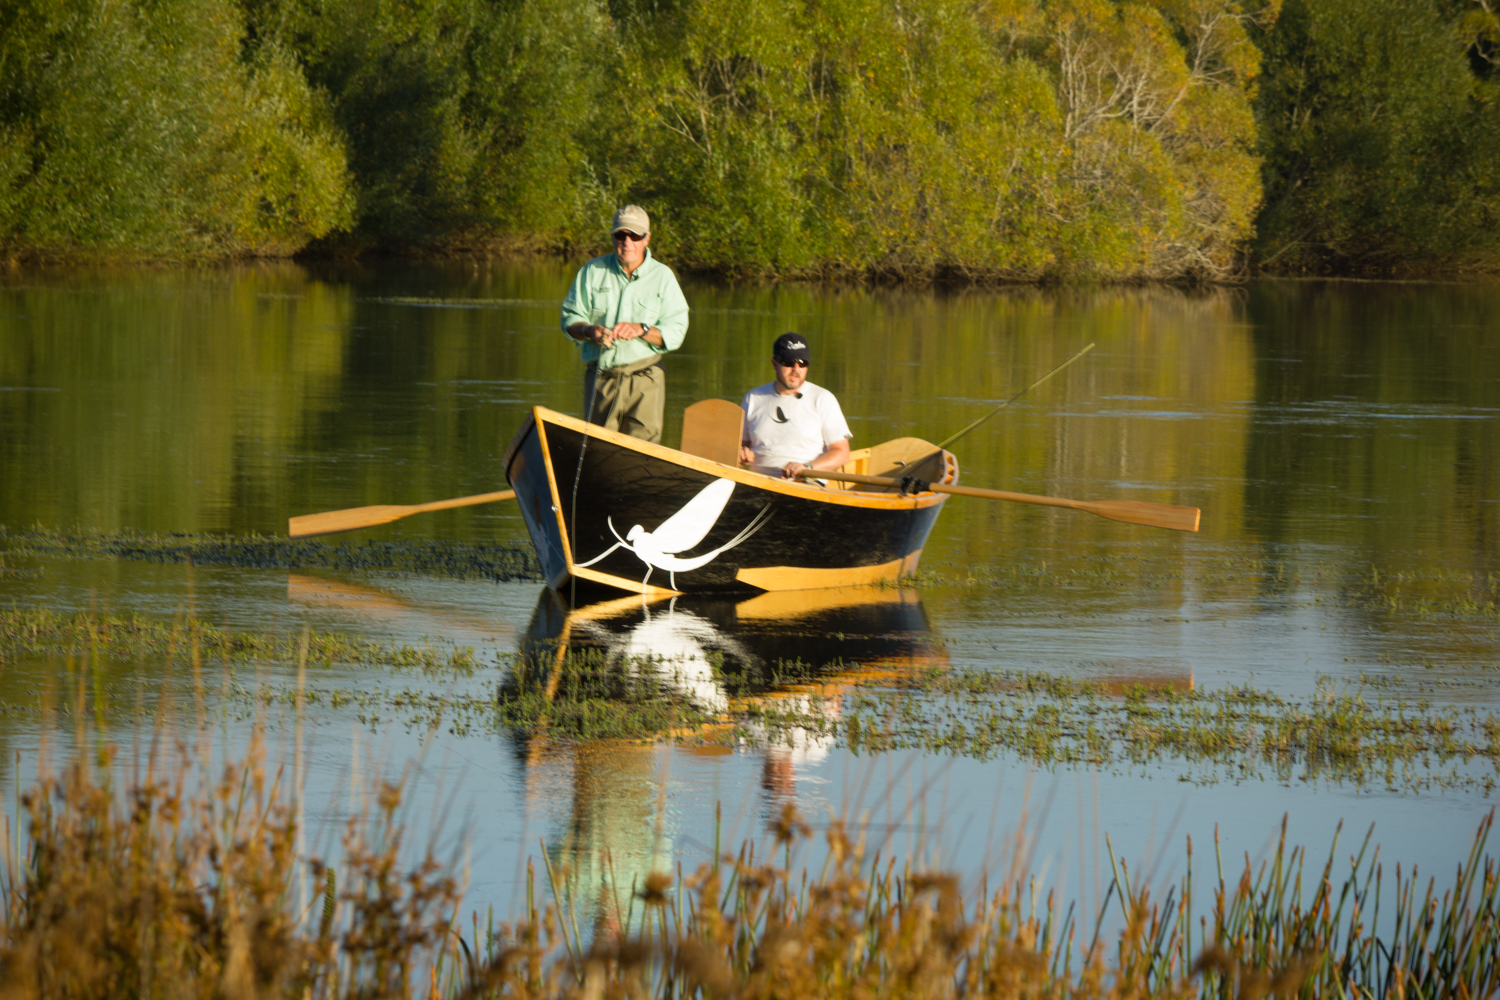
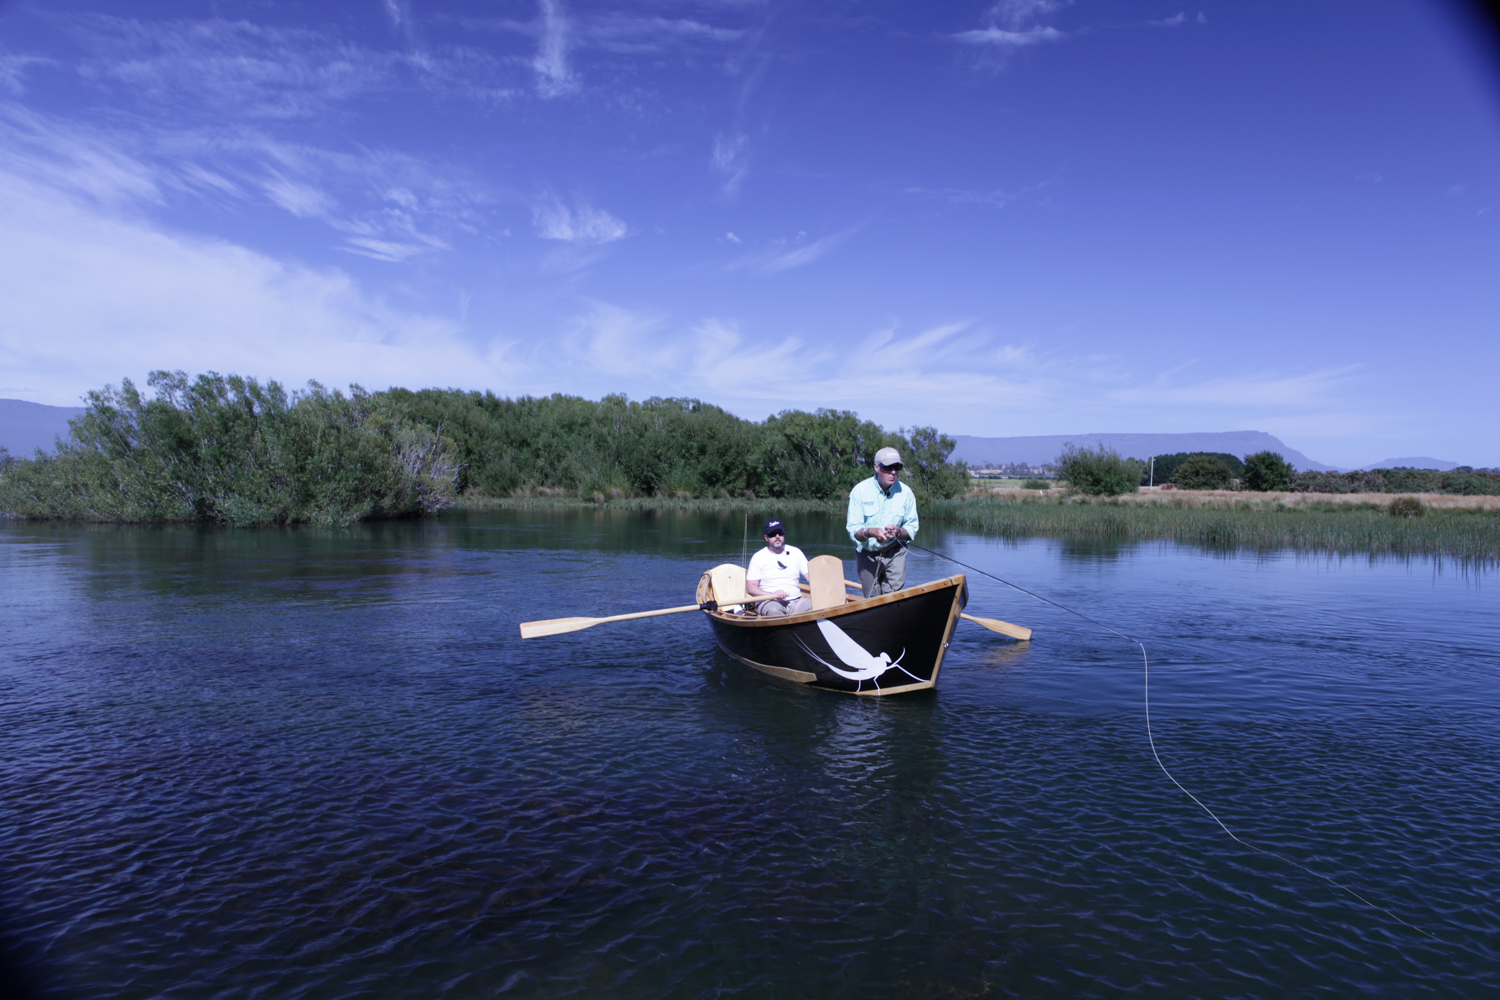
Legendary American boat-builder, Woodie Hindman, designed the McKenzie River Drift Boat around 1946, and they quickly became a favourite of American fly-fishing guides. Mac boats are as tough (certified for class 4 rapids) as they are beautiful, they’re a charm to row due to the accentuated rocker, and can pivot on a 10 cent piece. Perfect for fly-fishing, the high bow gives the angler a higher elevation for spotting fish, while the oarsman has no trouble maneuvering the boat in all kinds of water.
Tasmania doesn’t have the big freestone rivers of North America, our waters are more meadow streams and big open lakes. And while Mac boats may seem over- gunned for this job, their shallow draft and maneuverability gets anglers into places other boats simply can’t go.
BUILDING THE BOAT
What do you need to build a boat? Timber, tools and time… easy, right?
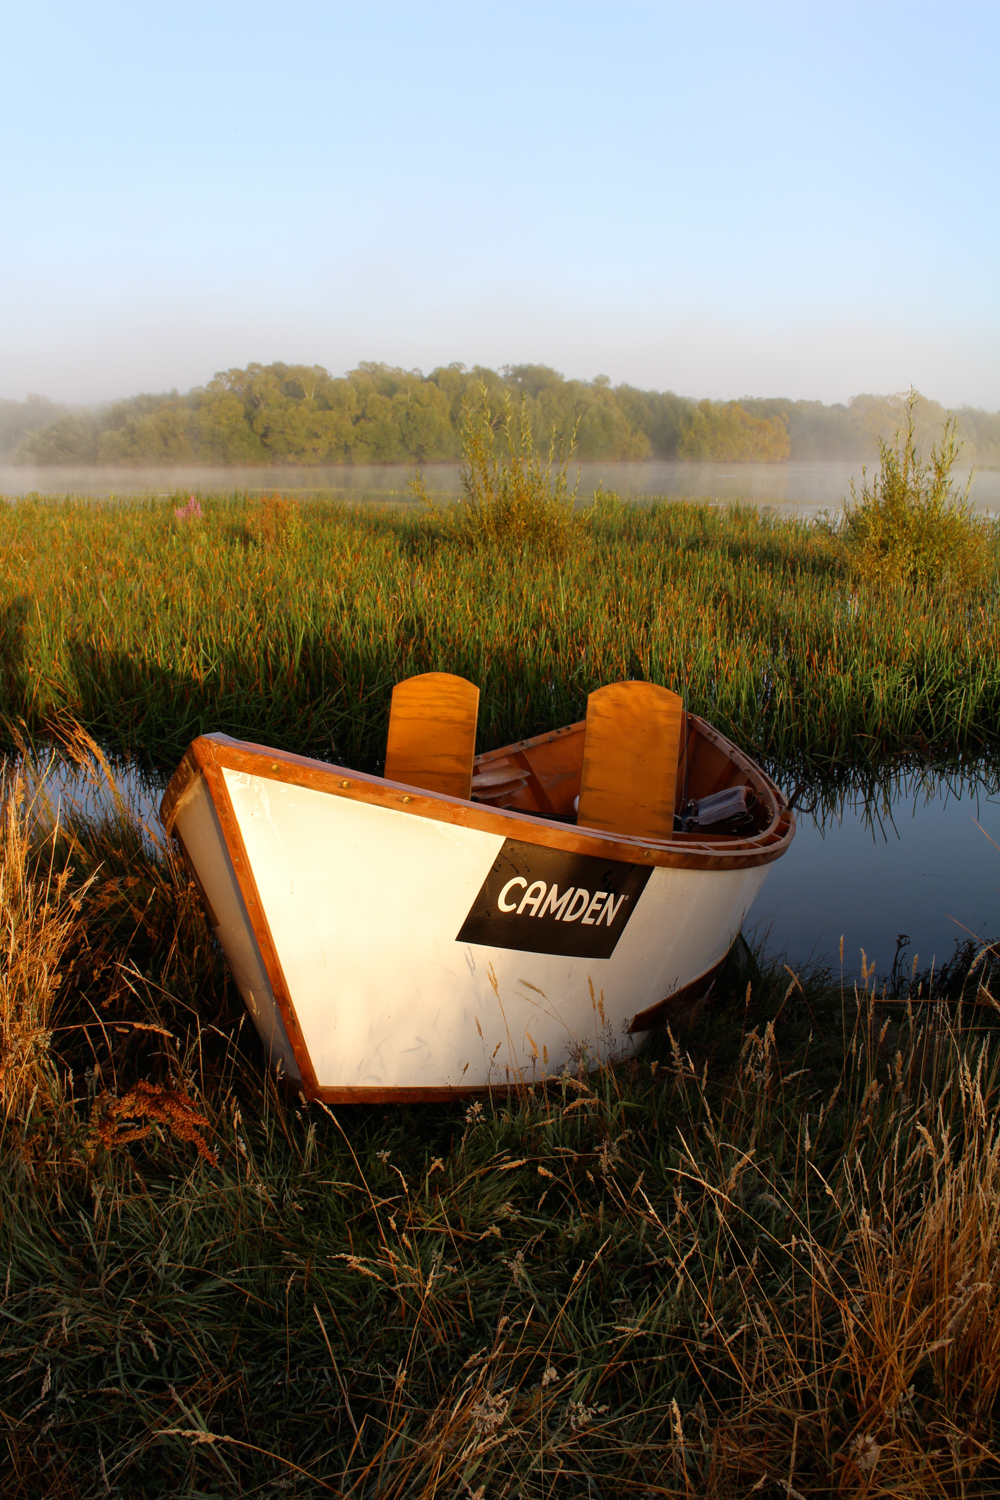
Huon Pine is our favourite timber; Tasmanian boat builders have been using it for over 200 years. It’s easy to work with, strong, smells amazing and most importantly it never rots! Huon is an increasing rare commodity; we chose to use salvaged wood from Queenstown, on the remote West Coast. The piners, as they’re known, drag up logs from the mighty Gordon and Franklin Rivers; it only seemed appropriate that wood drifting on the river ends up a wooden river Drift Boat. How many years of this diminishing resource we have left is uncertain, but any boat made from this wonderful timber will definitely out live us.
For The Mayfly, our first boat, we used a combination of Huon, Celery Top and King Billy pine, all endemic Tasmanian timbers and perfect for boat building. Some of the longer lengths required simply weren’t available so most of the external rails and chines are scarfed. Wood glue and a little patience make these joins virtually unbreakable, and added another level of skill to the build, mills like Bradshaw’s, in Queenstown, need a simple cut list and will cut the timber to any size, a wondrous service in this day and age. The other essential ingredient is Marine Ply, this had to be shipped from Queensland, we chose AAA grade hoop ply, it’s easy to work with and tough as all get out.
PETER THE CARPENTER (AND BOAT BUILDER)
Being a carpenter, my man cave is overflowing with tools. Modern equipment certainly helps speed up the building process; the complex cuts and joins are even manageable in the backyard workshop (or on the back lawn). However, hand tools are not to be ignored and still play a critical part in boat building. It is even possible to build a Drift Boat without an extension cord. I found myself relying on hand planes and a tenon saw just as much as the drop saw.
There’s a lot of jargon in boat building, I read and re-read the instruction book to try and get my head around it all. Loft this, chine log that, and what the hell is a thole? Oh well, just get on with it! My inner monologue battled with impatience and enthusiasm in equal proportions, I wondered what it would be like when we were floating down the Esk, damn it man concentrate!
BUILDING YOUR BOAT
The first thing to do is loft the plans onto the ply sheets, attention to detail is critical and a simple word of advice here may be appropriate, if you haven’t built a boat before, stick to the plans. Even minor changes will have more of an impact than expected.
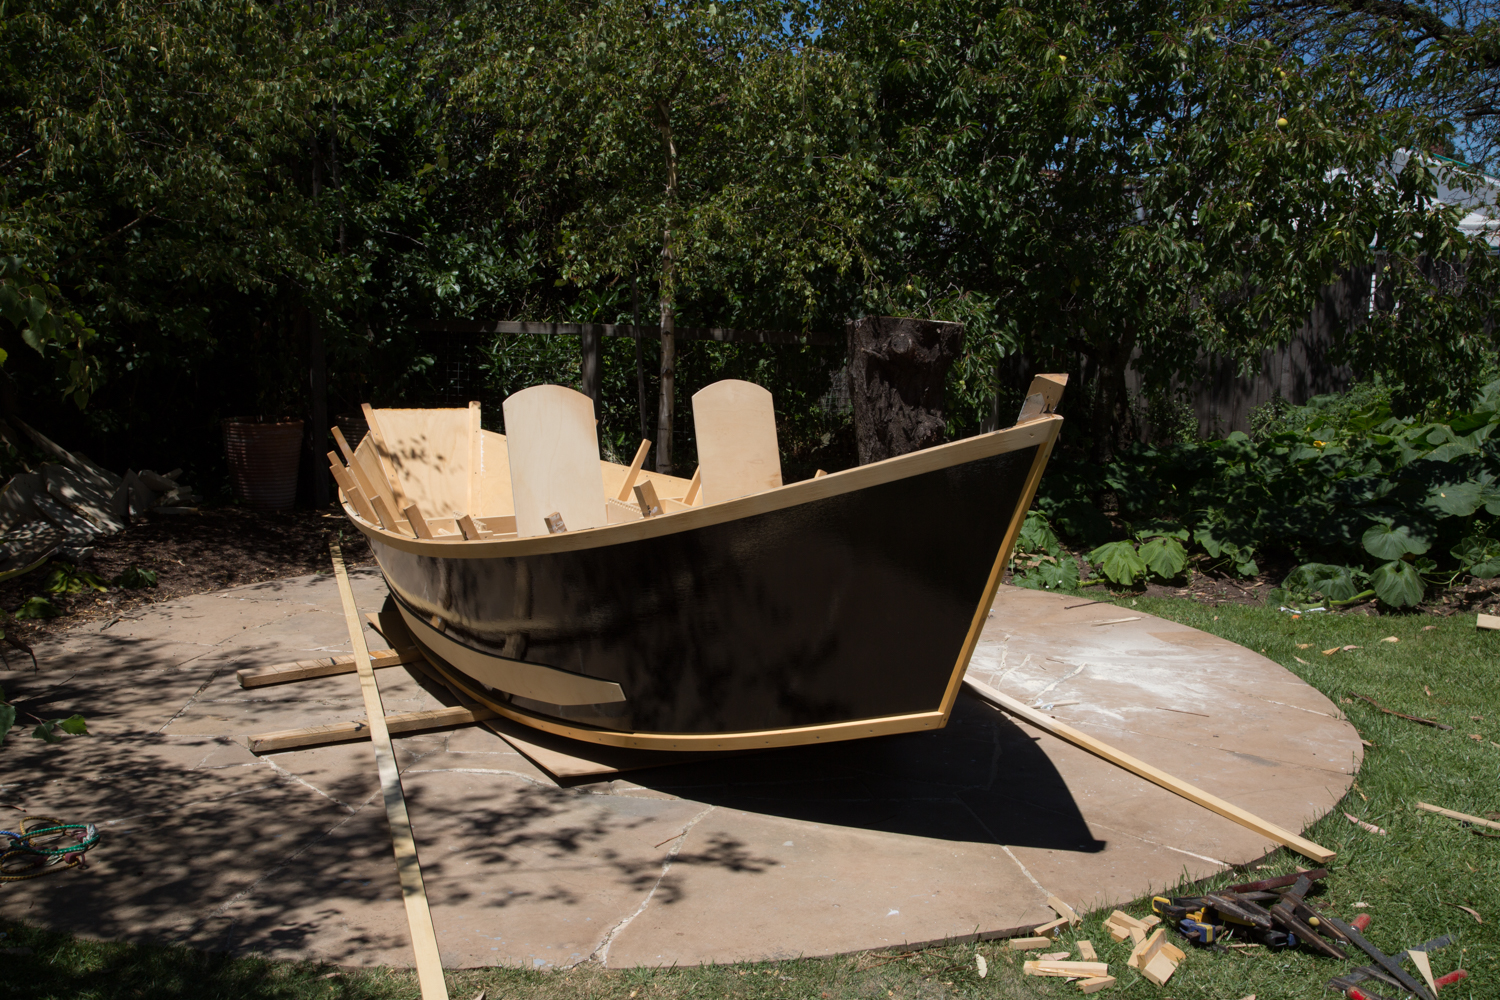
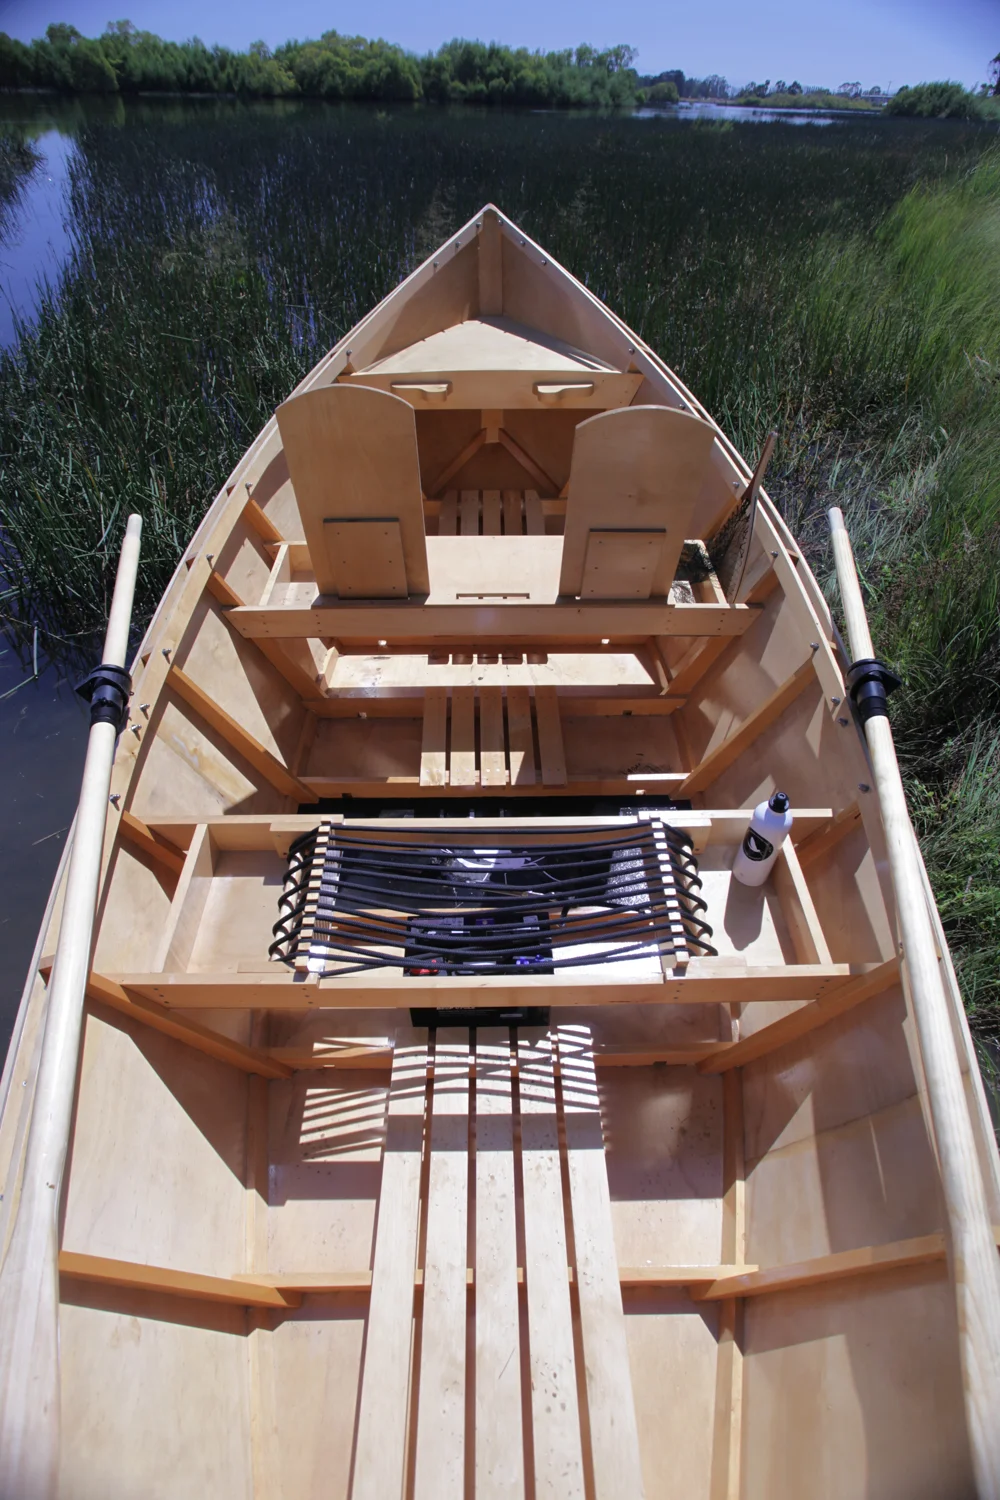
Scarfing the ply is the first step, we found a belt sander was the most successful for this job, keep the lines of the exposed layers straight and it will all become apparent down track. With the cutout of the sheets we use a power saw with a guide, this gives us a very accurate working edge. This is probably the time to discuss the most suitable glue, we used International Paints Epiglue, a two-part adhesive that is easy to mix, apply and sand. Once the ply is cut, move onto the ribs. A good quality bevel, sharp plane, strong vice and lofted plans are all essential to get this part correct. Take your time with the bevels and check continually, lay them out on the lofted plan and you will soon see if they need any more adjustment.
Assembly at the beginning is one of the most challenging parts of the build. Both sides have to be screwed to the transom and then tortured around the centre rib. Doing it by the book leads to breakages and swearing! A little frustrated I consulted You Tube, which revealed an alternative approach. Screw in the stem post as shown, then screw in the transom, place the centre rib in position, secure, then working from the centre, alternate rib placement forward and aft. This is so much easier and it works.
Continue to sand as smooth as you go removing excess glue now will save a lot of time at the end. Fitting the chine logs is tricky, check the rib cut outs and front and rear bevel cuts, always remembering that these are forever visible.
Once fitted, check for square and sand everything to get a tight fit with the bottom sheets, remember to line up the join in the sheets with the centre rib (you won’t see the join) for a much better finish. When cutting out the bottom panel keep as close as you can to the scribed mark, if you don’t there’ll be a lot of extra sanding before you can apply the external chines. I love this point of the build, the shape is clear, a lot of the complex cuts are done, and it starts to look like a boat.
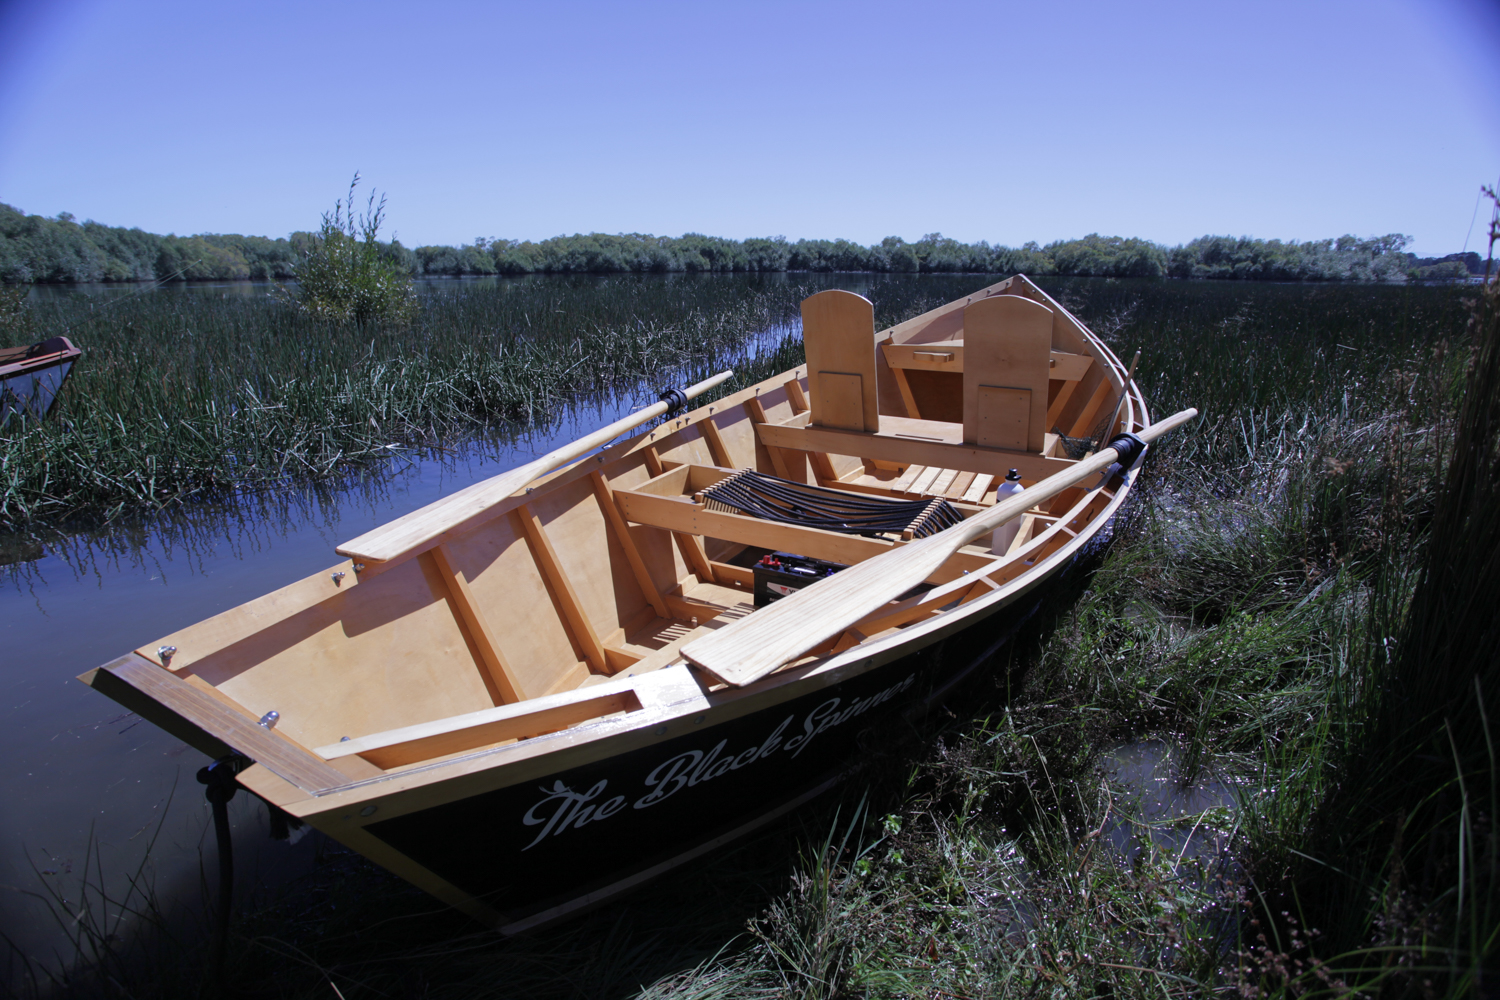
Now is the time to fill and sand the exterior, this is a critical point and requires a lot of attention, as this is what will give you a better final finish. For filling we use International paints Epifill, once again a two-part product that is stiff to apply yet sands beautifully and takes paint very well. Once filled and sanded, apply primer and allow to dry, check for imperfections and fill if necessary.
I prefer to paint by hand, a brush and roller gives a more traditional finish and allows plenty of flexibility with colour choices. Two coats of primer gives a great finish when sanded and take the undercoat really nicely. Be careful painting outdoors, as enamel paint attracts flies more than cow dung. You can end up with a lot of unwanted tiny beasties set into the finish. And, rain is no friend either! The Mayfly ended up in my lounge room one wet January night.
TIME TO GO FISHING
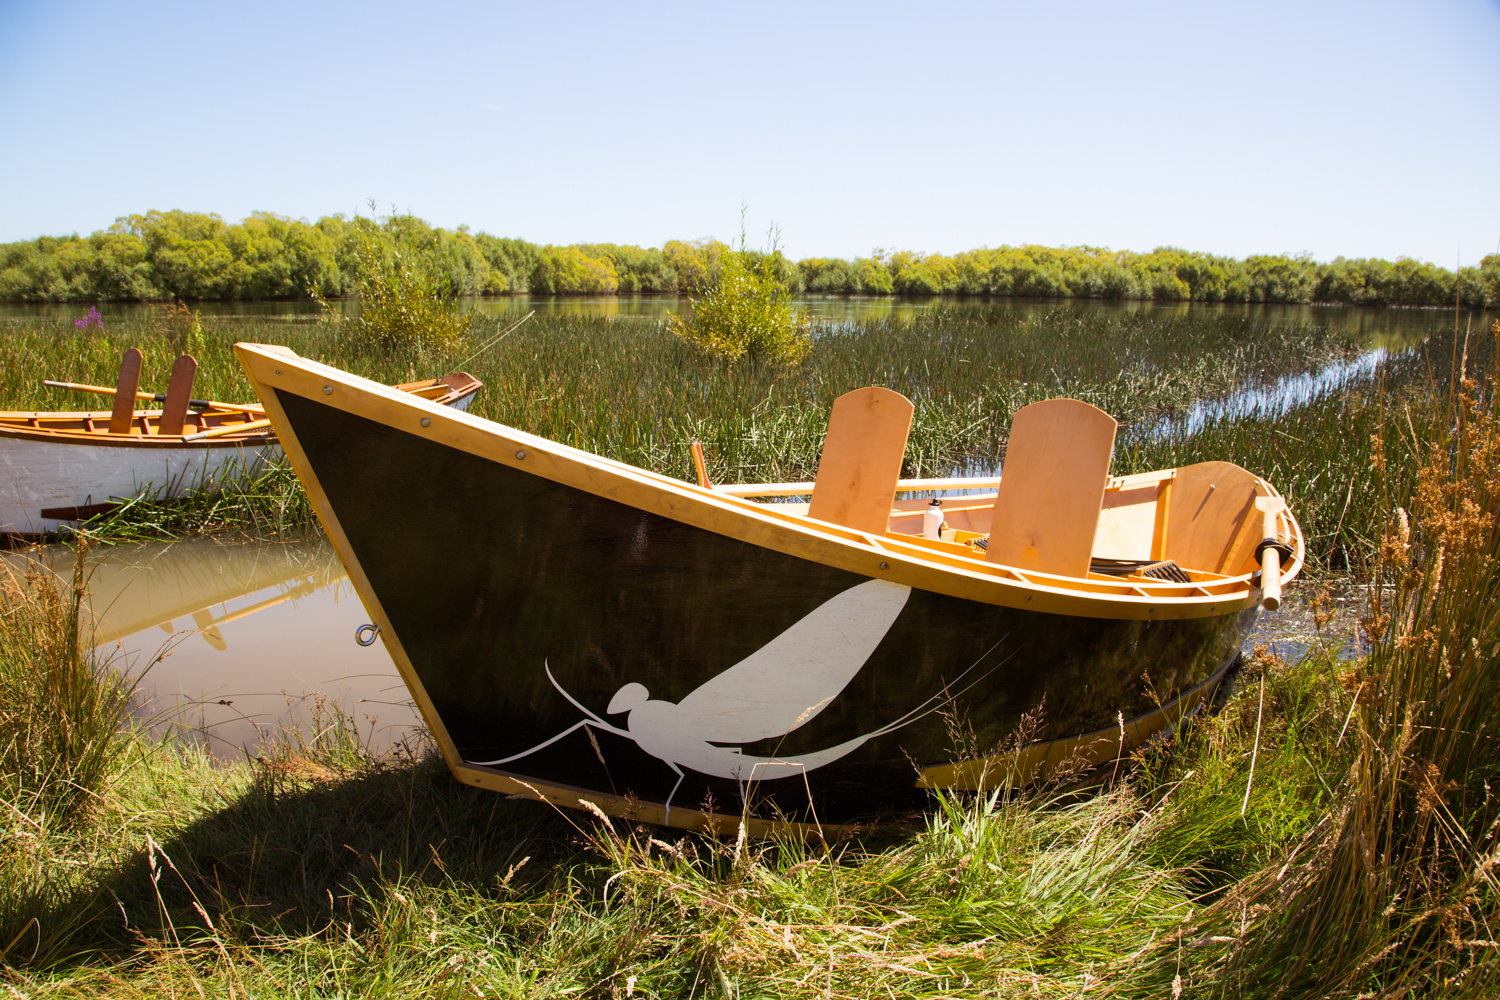
I woke up on another Sunday morning, three months later, with an enormous sense of satisfaction, there on my front lawn was a hand crafted Drift Boat, something that I had wanted my entire life. Marcus and I got straight to work applying the vinyl graphics, roping up the seat and packing our gear. My father-in-law was due in an hour to drive us to the river. As we all stood around admiring the boat, Marcus brought me swiftly back to reality by asking “reckon she’ll float?” in all the excitement we hadn’t even tested the bloody thing in the water.
Two hours later we we’re drifting down the South Esk river somewhere in Tasmania. The first bend in the river spun the boat, tore off paint and shot us straight into the willows. It’s fair to say we we’re pretty anxious!
The days that followed were a steep learning curve, we battled strong head winds, and low summer flows that resulted in us carrying the boat through some sections of the river. No hatches, very few fish and no cutlery, needless to say it wasn’t one of the best fishing trips we had ever had! We eventually cut the trip short, conceding defeat to a relentless Northern sea breeze.
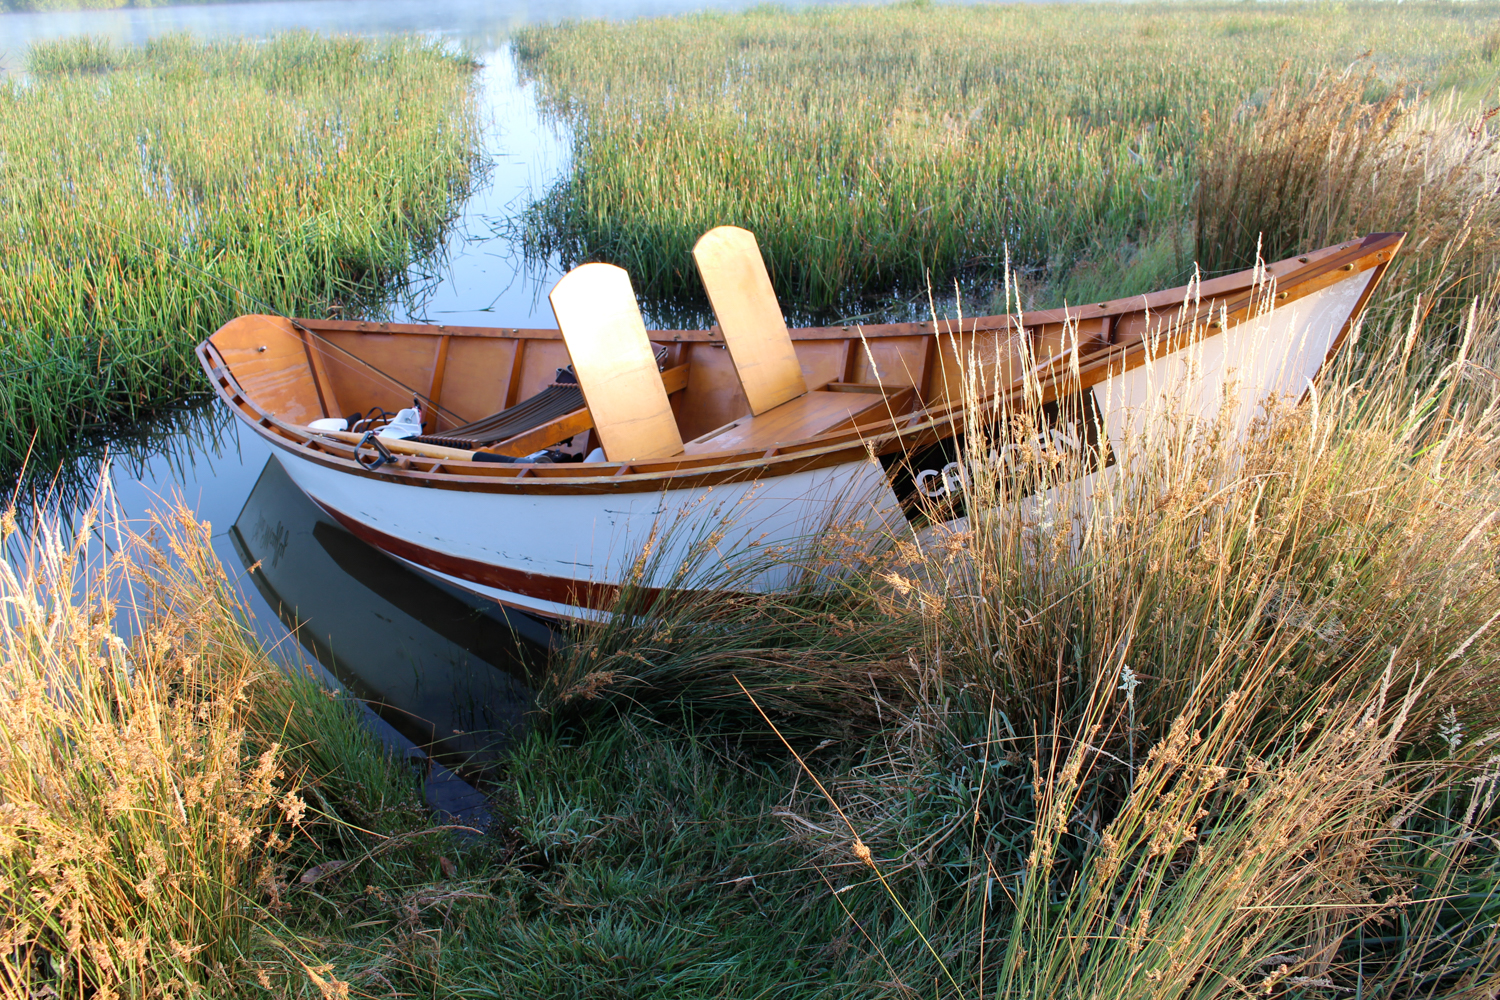
Subsequent drifts have been less dramatic, or perhaps our confidence has increased. Either way, we’re now both hooked on drifting rivers.
THE BENEFITS OF A DRIFT BOAT
Drift boats as their name suggests are at home on rivers, yet we’ve had enormous success using them on our local lakes. The ability to drift gently along shallow edges or drop-offs and reach spots deeper draft boats can’t is a real bonus. Many of the fish we have caught out of the boat have been caught in six inches of water. Drift boats are perfect for patrolling the edges of Penstock Lagoon, and casting back towards the weedy edges where fish are nymphing or rising to mayflies.
One of our favourite waters is Brumbys Creek in the north of the State. Brumbys Creek is a renowned tailwater, with wonderful weed beds reminiscent of English chalk streams. It’s a tough fishery, but drifting its waters opens up new opportunities that shore based angling simply cannot reach. Last season a very polite elderly gentlemen cautioned us about chasing the splashing birds on the opposite bank, we rowed over and had an hour and half of spectacular dry fly fishing.
Tasmania is a long way from Oregon, yet perhaps that’s what great design is all about, here we are 80 years after they were first designed, building and using these wonderful boats on the other side of the world. They evoke an inherent sense of wonder in everyone. The people we meet on the water are drawn to them like a trout to a mayfly.
Marcus
#TheSeasonNeverEnds